文章想要说明的内容如标题所言,文章部分内容节选于官方文档。
配置文件说明:
PowerShell 支持多个配置文件。 此外,PowerShell 主机程序还可以支持其自己的特定于主机的配置文件。
例如,PowerShell 控制台支持以下基本配置文件。 配置文件按优先级顺序列出。 第一个配置文件的优先级最高。
| 说明 | 路径 |
|---|---|
| 所有用户,所有主机 | Windows: $PSHOME \Profile.ps1Linux: /usr/local/microsoft/powershell/7/profile.ps1macOS: /usr/local/microsoft/powershell/7/profile.ps1 |
| 所有用户,当前主机 | Windows: $PSHOME \Microsoft.PowerShell_profile.ps1Linux: /usr/local/microsoft/powershell/7/Microsoft.Powershell_profile.ps1macOS: /usr/local/microsoft/powershell/7/Microsoft.Powershell_profile.ps1 |
| 当前用户,所有主机 | Windows: $Home \ [My] 文档 \ PowerShell \Profile.ps1Linux: ~/.config/powershell/profile.ps1macOS: ~/.config/powershell/profile.ps1 |
| 当前用户、当前主机 | Windows: $Home \ [My] 文档 \ PowerShell \Microsoft.PowerShell_profile.ps1Linux: ~/.config/powershell/Microsoft.Powershell_profile.ps1macOS: ~/.config/powershell/Microsoft.Powershell_profile.ps1 |
参照上表的说明,第四种配置方法是配置文件生效范围最小的一种方式,也符合日常使用中最常遇见的场景,所以我们以第四种配置举例。
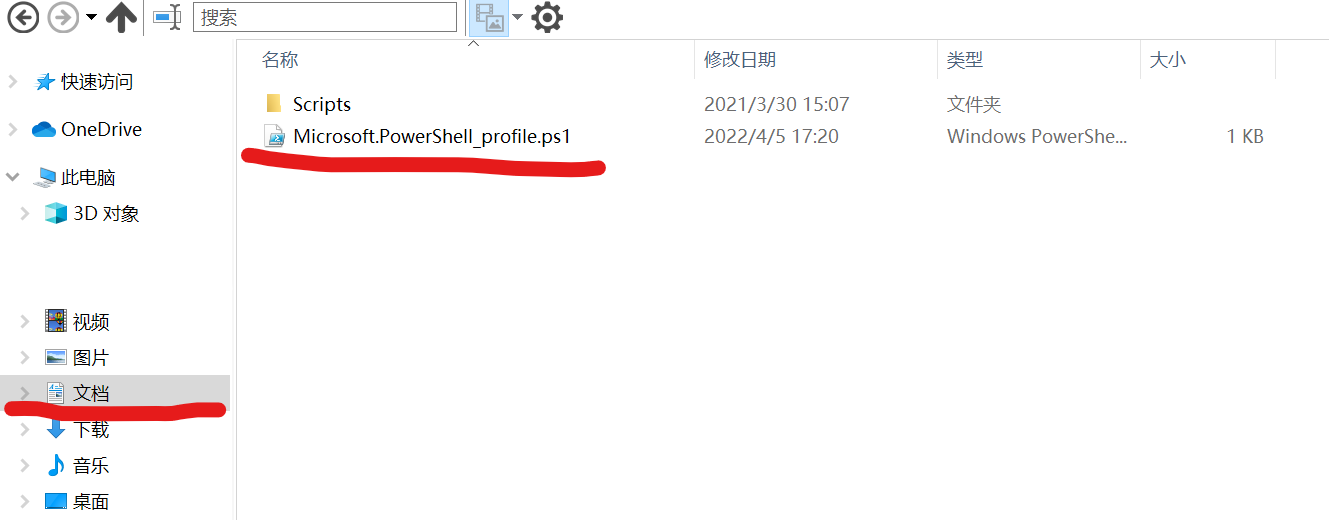
打开Windows资源管理器,点击左侧列表中个人文件夹的“文档”路径,在里面找到Powershell文件夹:

找到当前目录下的 Microsoft.PowerShell_profile.ps1 文件,如果没有该文件,新建一个同名文件即可。
然后右键点击“编辑”,使用Windows记事本进行编辑,详细的书写格式请参考官方链接1,下面是举例:
function proxy-default {
    $env:http_proxy="http://127.0.0.1:1086"
    $env:https_proxy="http://127.0.0.1:1086"
}

function proxy-clear {
    $env:http_proxy=""
    $env:https_proxy=""
}

function proxy-config {
    echo "http_proxy: $env:http_proxy"
    echo "https_proxy: $env:https_proxy"
}

function open {
    explorer.exe -Name
}
保存后关闭文档,然后重新打开Powershell就生效了。
参考文档:
最后一次更新于2022-04-05


0 条评论